
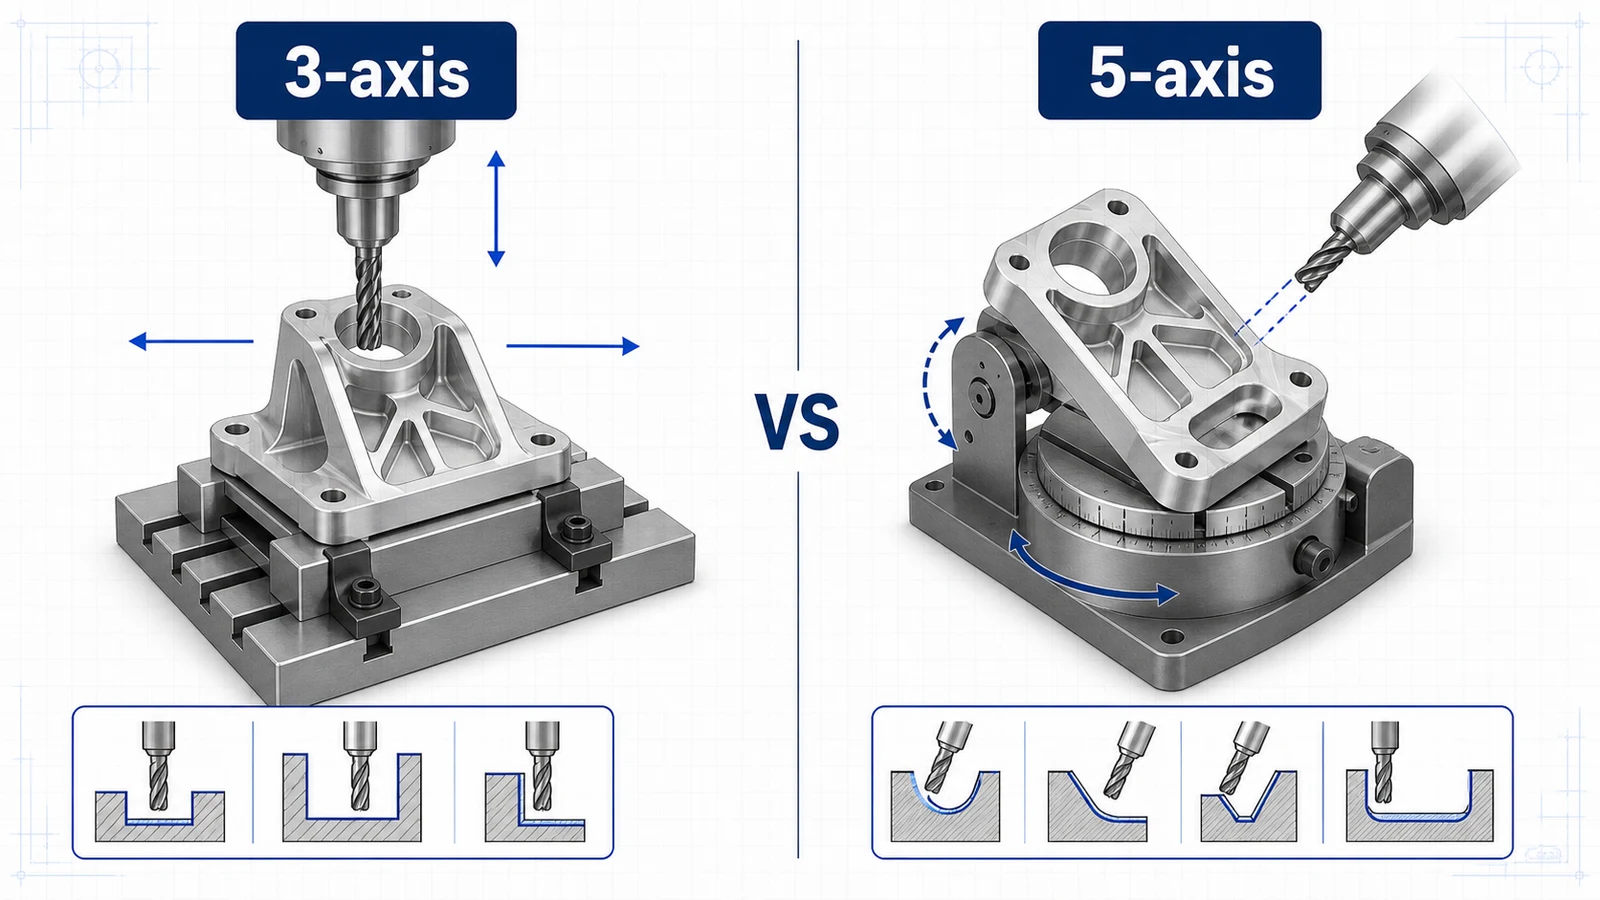
Both 3-axis and 5-axis CNC machining can produce accurate aluminum parts. The best choice depends on geometry, setup count, feature access, tolerance relationships, surface finish, quantity, and cost. A 5-axis machine is not automatically better. A 3-axis route is not automatically cheaper. The right answer is the process that makes the part accurately with the lowest total risk.
Engineers and sourcing managers should compare the whole manufacturing route, not just the machine type.
What 3-axis machining does well
3-axis machining is efficient for aluminum parts with features that can be reached from one or more straight setups. Plates, brackets, simple housings, pockets, covers, spacers, manifolds, and many fixture components can be made this way.
The process is familiar, widely available, and cost-effective. Workholding can be simple for rectangular stock. Tooling and inspection are straightforward when critical features are on the top face or on a few perpendicular sides.
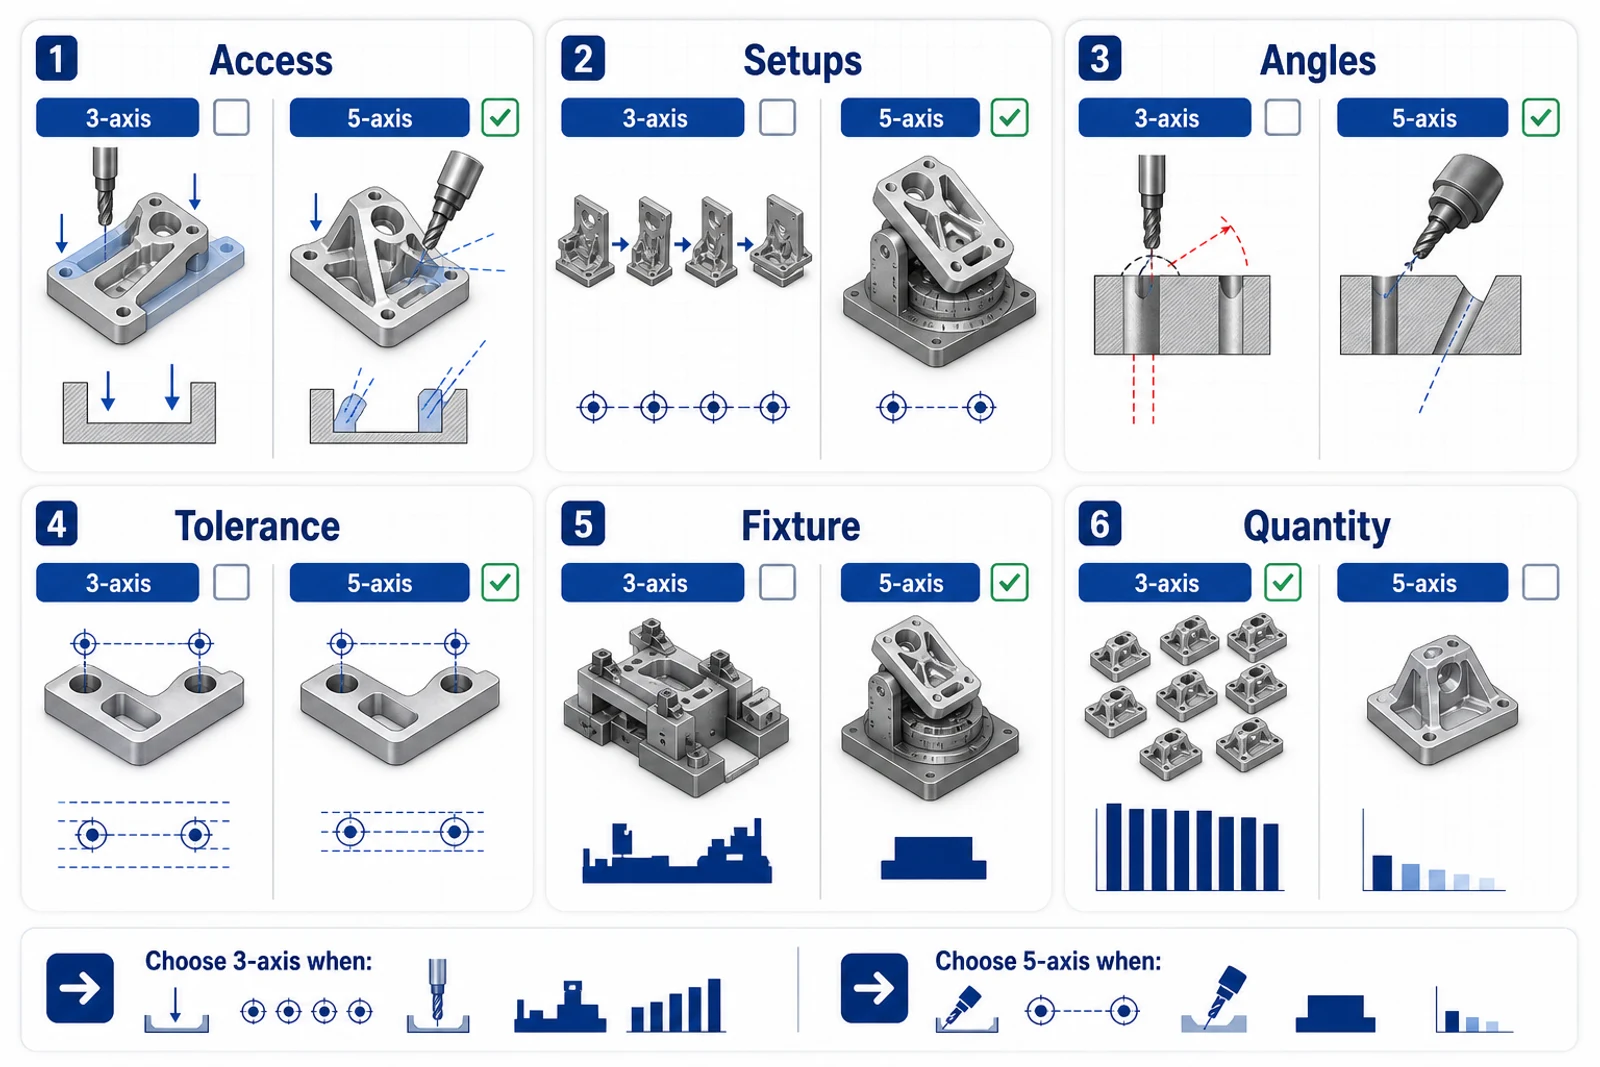
Use 3-axis machining when:
- Most features are accessible from top, bottom, or simple side setups.
- Angled features are minimal or can be handled with fixtures.
- Tolerance relationships do not require many faces to be machined in one setup.
- Quantity does not justify complex dedicated fixtures.
- The geometry is plate-like or block-like.
For many 6061 aluminum CNC parts, 3-axis machining is the most practical route.
What 5-axis machining does well
5-axis machining allows the tool or part to rotate, giving access to angled faces, undercut-like orientations, compound surfaces, and multiple sides with fewer setups. It can reduce repositioning error and fixture complexity on parts with features spread around several faces.
Use 5-axis machining when:
- The part has angled holes, compound faces, or complex contours.
- Multiple critical surfaces must be held in relation to each other.
- Setup reduction lowers inspection and rework risk.
- Tool access is difficult with straight 3-axis setups.
- Shorter tools can improve surface finish or reduce chatter.
5-axis machining is often helpful for complex aluminum housings, aerospace brackets, robotics arms, impeller-like shapes, and optical components.
Cost comparison
| Cost factor | 3-axis impact | 5-axis impact |
|---|---|---|
| Machine hourly rate | Usually lower | Usually higher |
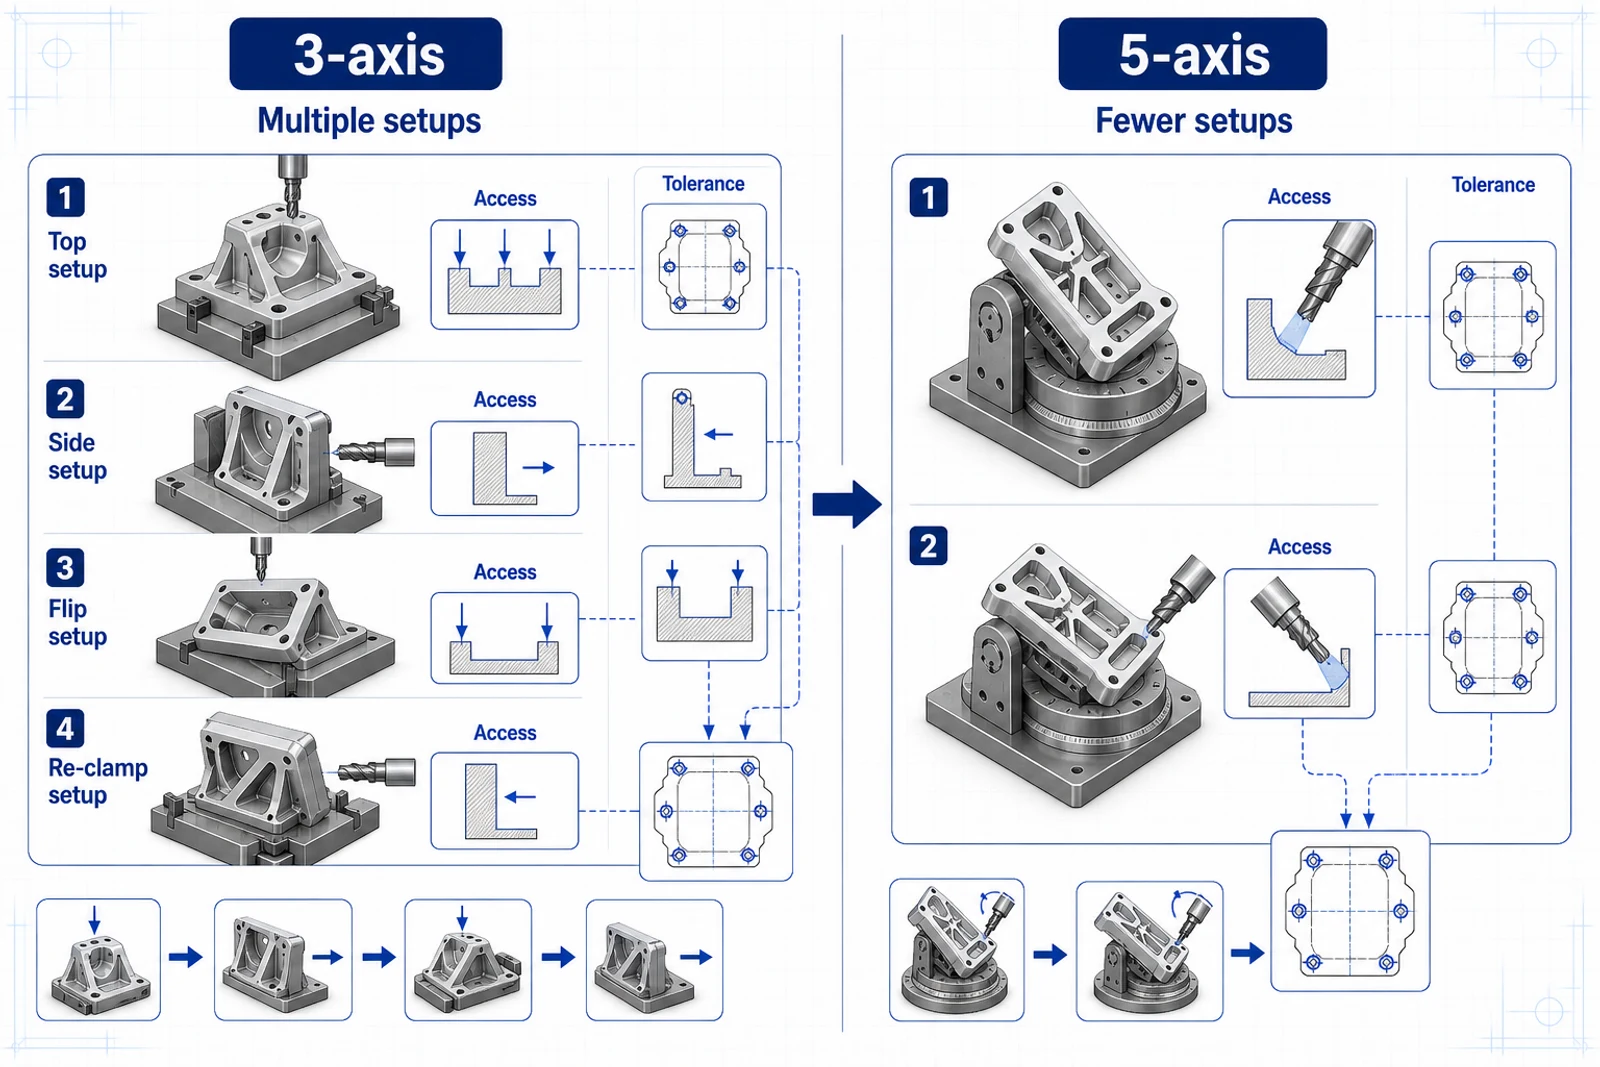
| Setup count | May require more setups | Often fewer setups |
| Fixture complexity | Simple to moderate | Can be lower for complex geometry |
| Programming | Usually simpler | More complex |
| Tolerance stack | Can accumulate across setups | Can reduce repositioning error |
| Tool access | Limited by direction | Better access to angled surfaces |
The cheapest route is not always the machine with the lowest hourly rate. If 5-axis machining removes three setups, custom fixtures, and difficult inspection, it may reduce total cost.
Tolerance relationships
Process choice matters when features on different faces must align. A bracket with holes on one face and a precision bore on another may be possible on 3-axis equipment, but each repositioning adds setup error. A 5-axis route may machine those features in a single clamping or with fewer datum transfers.
If the drawing has tight position tolerances across multiple faces, share that with the supplier early. The supplier can decide whether 5-axis machining, a dedicated fixture, or a revised datum scheme is the best route.
Surface access and tool length
Deep pockets and tall walls may require long tools on a 3-axis machine. Long tools can chatter, deflect, and leave poor surface finish. A 5-axis machine can sometimes tilt the tool to improve access or use shorter tools, especially on angled surfaces.
However, 5-axis is not a cure for every deep pocket. Internal corners still need cutter radii. Narrow slots still limit tool diameter. Design for tool access no matter which machine is used.
Quantity and repeat orders
For prototypes, 5-axis machining may reduce fixture time and speed up a complex first article. For repeat production, a 3-axis process with dedicated fixtures may become more economical if the part is stable and geometry allows it.
Tell the supplier whether the order is a one-off prototype, pilot batch, or recurring production part. The process decision may change based on volume.
RFQ guidance
You do not need to specify the machine type unless the process is part of your requirement. Instead, send STEP, PDF drawing, alloy, finish, quantity, critical dimensions, and application notes. Ask the supplier to recommend the best route.
If you think 5-axis is required, explain why: angled access, tolerance relationship, surface finish, or setup reduction. If cost is the priority, say which tolerances and faces are critical so the supplier can evaluate a simpler process.
Good process selection is collaborative. The drawing defines what the part must do. The machining plan defines how to make it repeatably.